-
• #27
Just to add, the following two would be nice as well:
-
• #28
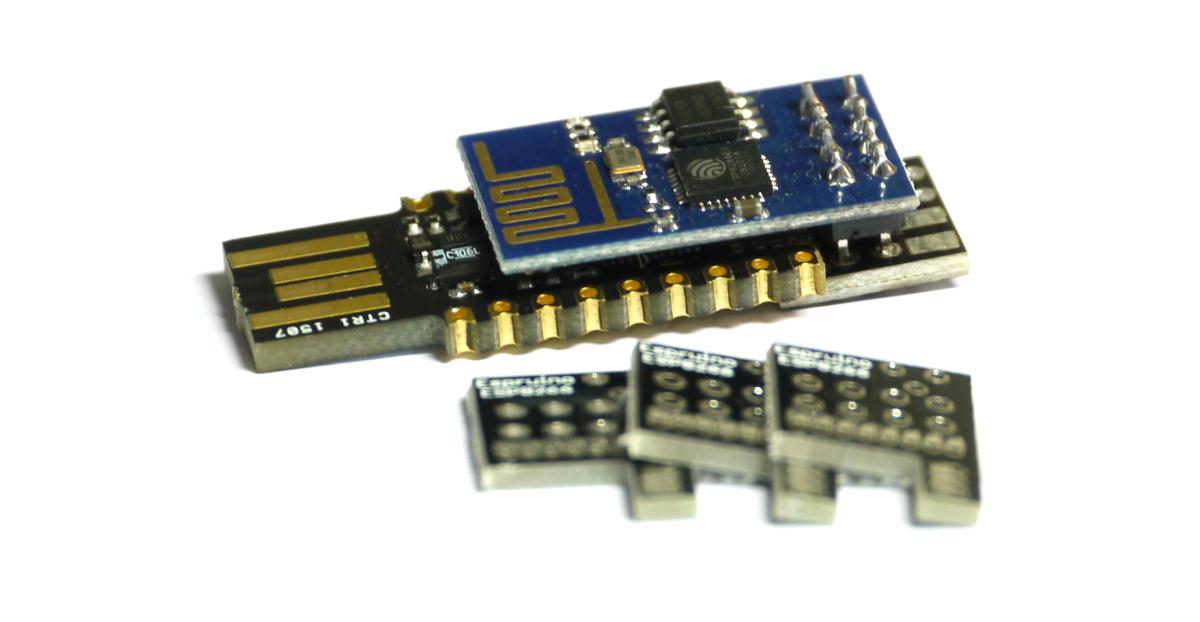
Quick update - just for the WIZnet and ESP8266 shims back from DirtyPCBs... Tested, and they work great - although I'm regretting not flipping the orientation on the WIZnet one!
So, anyone who bought WIZnet/ESP8266 via the KickStarter will get a free shim
1 Attachment
-
• #29
Another photo...
1 Attachment
-
• #30
sexy!
-
• #32
Awesome!
-
• #34
Yes, they're soldered right on using the castellations. I'll update the docs soon but if you look on the YouTube channel there is already a video.
I'll start some kind of shop for the shims after I ship the KS rewards. They're all online so you can just upload the files to OSHPark though - they'd be very good value.
-
• #35
How did you get the 0.05" pin header to work? No matter what I do, eagle insists on making the pads bigger than I say, causing it to fail drc check
-
• #36
Ahh, in DRC settings there is an option for the minimum pad around a hole. Easiest if you load one of the drc files that I think is in the repo.
-
• #37
Hmmm, I'm using the dirty pcb's DRC, since they're the ones who will be making the board...
-
• #38
I think that particular bit doesn't actually violate their design rules - I think their DRC file is probably just being safe... Once the minimum outline around a pad is set, the gap between pads increases and everything looks a lot better.
I've just had 1500 boards from them with that outline so I don't think they have any problem with it :)
-
• #39
Thanks, got it sorted, I think. 8mil was enough to pass DRC - so I figure I should be good.
-
• #40
Hello,
I foolishly didn't add a esp8266 adaptor to my pledge and im regretting it, is there anywhere i can buy one?
-
• #41
Not yet I'm afraid... However you can take the board file from GitHub and upload it to OSHPark.
Looks like it'll cost under $2 for 3 :)
-
• #42
I just tried to upload the files to OSHPark for the esp8266 adaptor but I always get a "Not a valid Eagle board file error". Any idea?
-
• #43
Just tried again and it works for me - however when I download the file at that link it tries to save it as
esp8266_small2.brd.txtwhen it should beesp8266_small2.brd. If you rename the file it should work. -
• #44
Err yeah sorry I just forgot to download the raw file, that's why it didn't work. :-)
For anyone who is interested, it costs $ 5.70 for the ESP12 boards (x3) and $ 1.55 for the ESP01 boards (x3). -
• #45
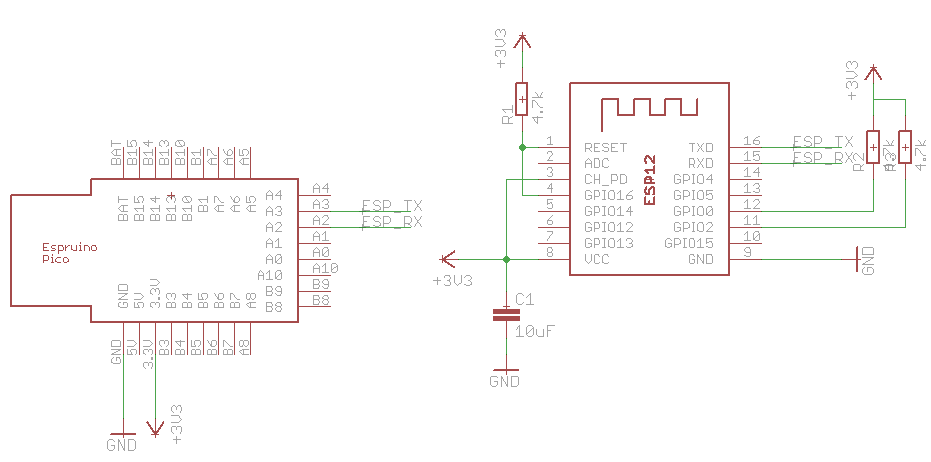
Great - I ought to add that I haven't actually tested the ESP12 boards yet (I'm still waiting for mine from OSHPark!) so I'd be interested to see how they work. The circuit is simple so you should be fine though - you don't actually need to populate the 3 resistors - they were only there so the ESP8266 could be put to sleep if needed.
-
• #46
I'm also waiting for the ESP12 board from OSHPark, than I will test it too.
-
• #47
Oh man - my ESP-12 is still on the way.
Today two of the ESP-12E arrived (they have some extra pins on the back side)
I think I can solder this also to the shim and tape the extra pins on the back.But one question of how do you stack this board...
I have only the Pico with pin headers - so I decided to remove the plastic parts of the headers
and push the shim directly below - so it is enough space left to stack everything onto breadboard.
But the ESP-12 shim has on the bottom side some space for 3x R and 1x C.
Are they really needed and what values should they have?Also I wonder how to solder the Bluetooth LE HM-10 Shim to Pico...?...
-
• #48
I just uploaded the circuit of the ESP8266 adaptor below. You don't need any of the extra components for normal operation, but an SMD capacitor (as big as you can get) could be an idea as the ESP8266 can draw quite a lot of power in bursts.
To put the bluetooth on I'm afraid you'd have to take the pins out of your pinned board. It's actually not that hard - just heat up and pull out each pin in turn. I guess you could also just pull the black bit off the bottom and then cut the pins flush with the bottom of the board.
If anyone can think of a way around it for shims like that (where the module on the bottom overlaps where the pins go) I'd be interested though. About the only solution I can see would be to make a long board like the ESP12 one. You could make a wider board that had space for a new set of pins on it, but then you still have to solder on an unpinned Pico.
1 Attachment
-
• #49
Thanks for the circuit - this helps a lot.
And for the bluetooth shim - I will try my best to remove the header pins.
But do I have to tape over some parts, or did the shim fit without any overlap? -
• #50
Does the bluetooth shim have exposed vias? Hopefully it shouldn't, and you don't need tape.
But if the vias are exposed I'd tape over just in case.
 Gordon

 alexanderbrevig
 the1laz
 d0773d
 DrAzzy
 user54624
 pdominique
 Jorgen
I'll definitely keep the same header and pinout for the Pico - and I intend to keep producing that as long as I can. Also, ST tend to keep basically the same pinout between their chips - so even if I changed the IC , I could still keep the same footprint.
I've put an original Espruino footprint on the Arduino adaptor board, so you can go between form factors - however I'm not really sure if having a Pico->Original adaptor helps that much, as I'll keep producing the original board too. If there's a good reason I can add one though.
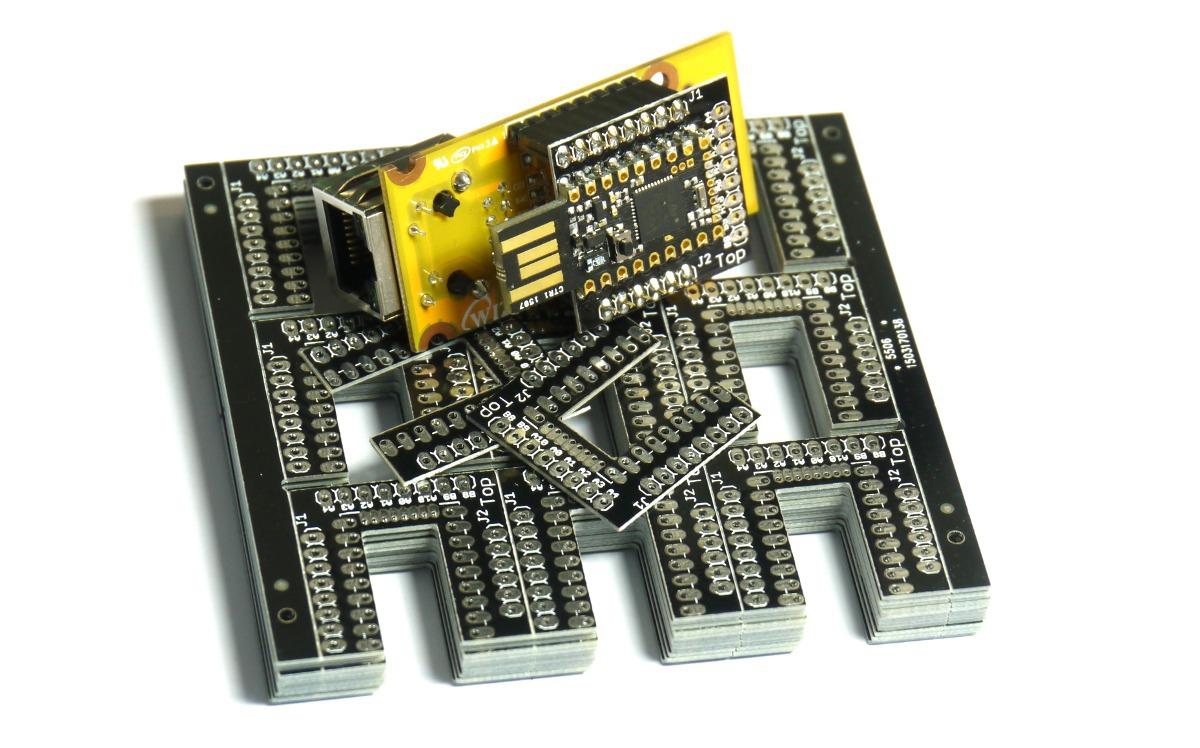
Quick update - I've just had a bunch of ESP8266 and WIZnet adaptors made by DirtyPCBs, so assuming they arrive on time and aren't horrific I'll be shipping them out with the KickStarter rewards that include WIZnet or ESP8266.
Also, for anyone who didn't see the KickStarter update - some of the adaptors:
1 Attachment