-
Apologies I didn't explain the concept very well. In order to turn this into code that we can say
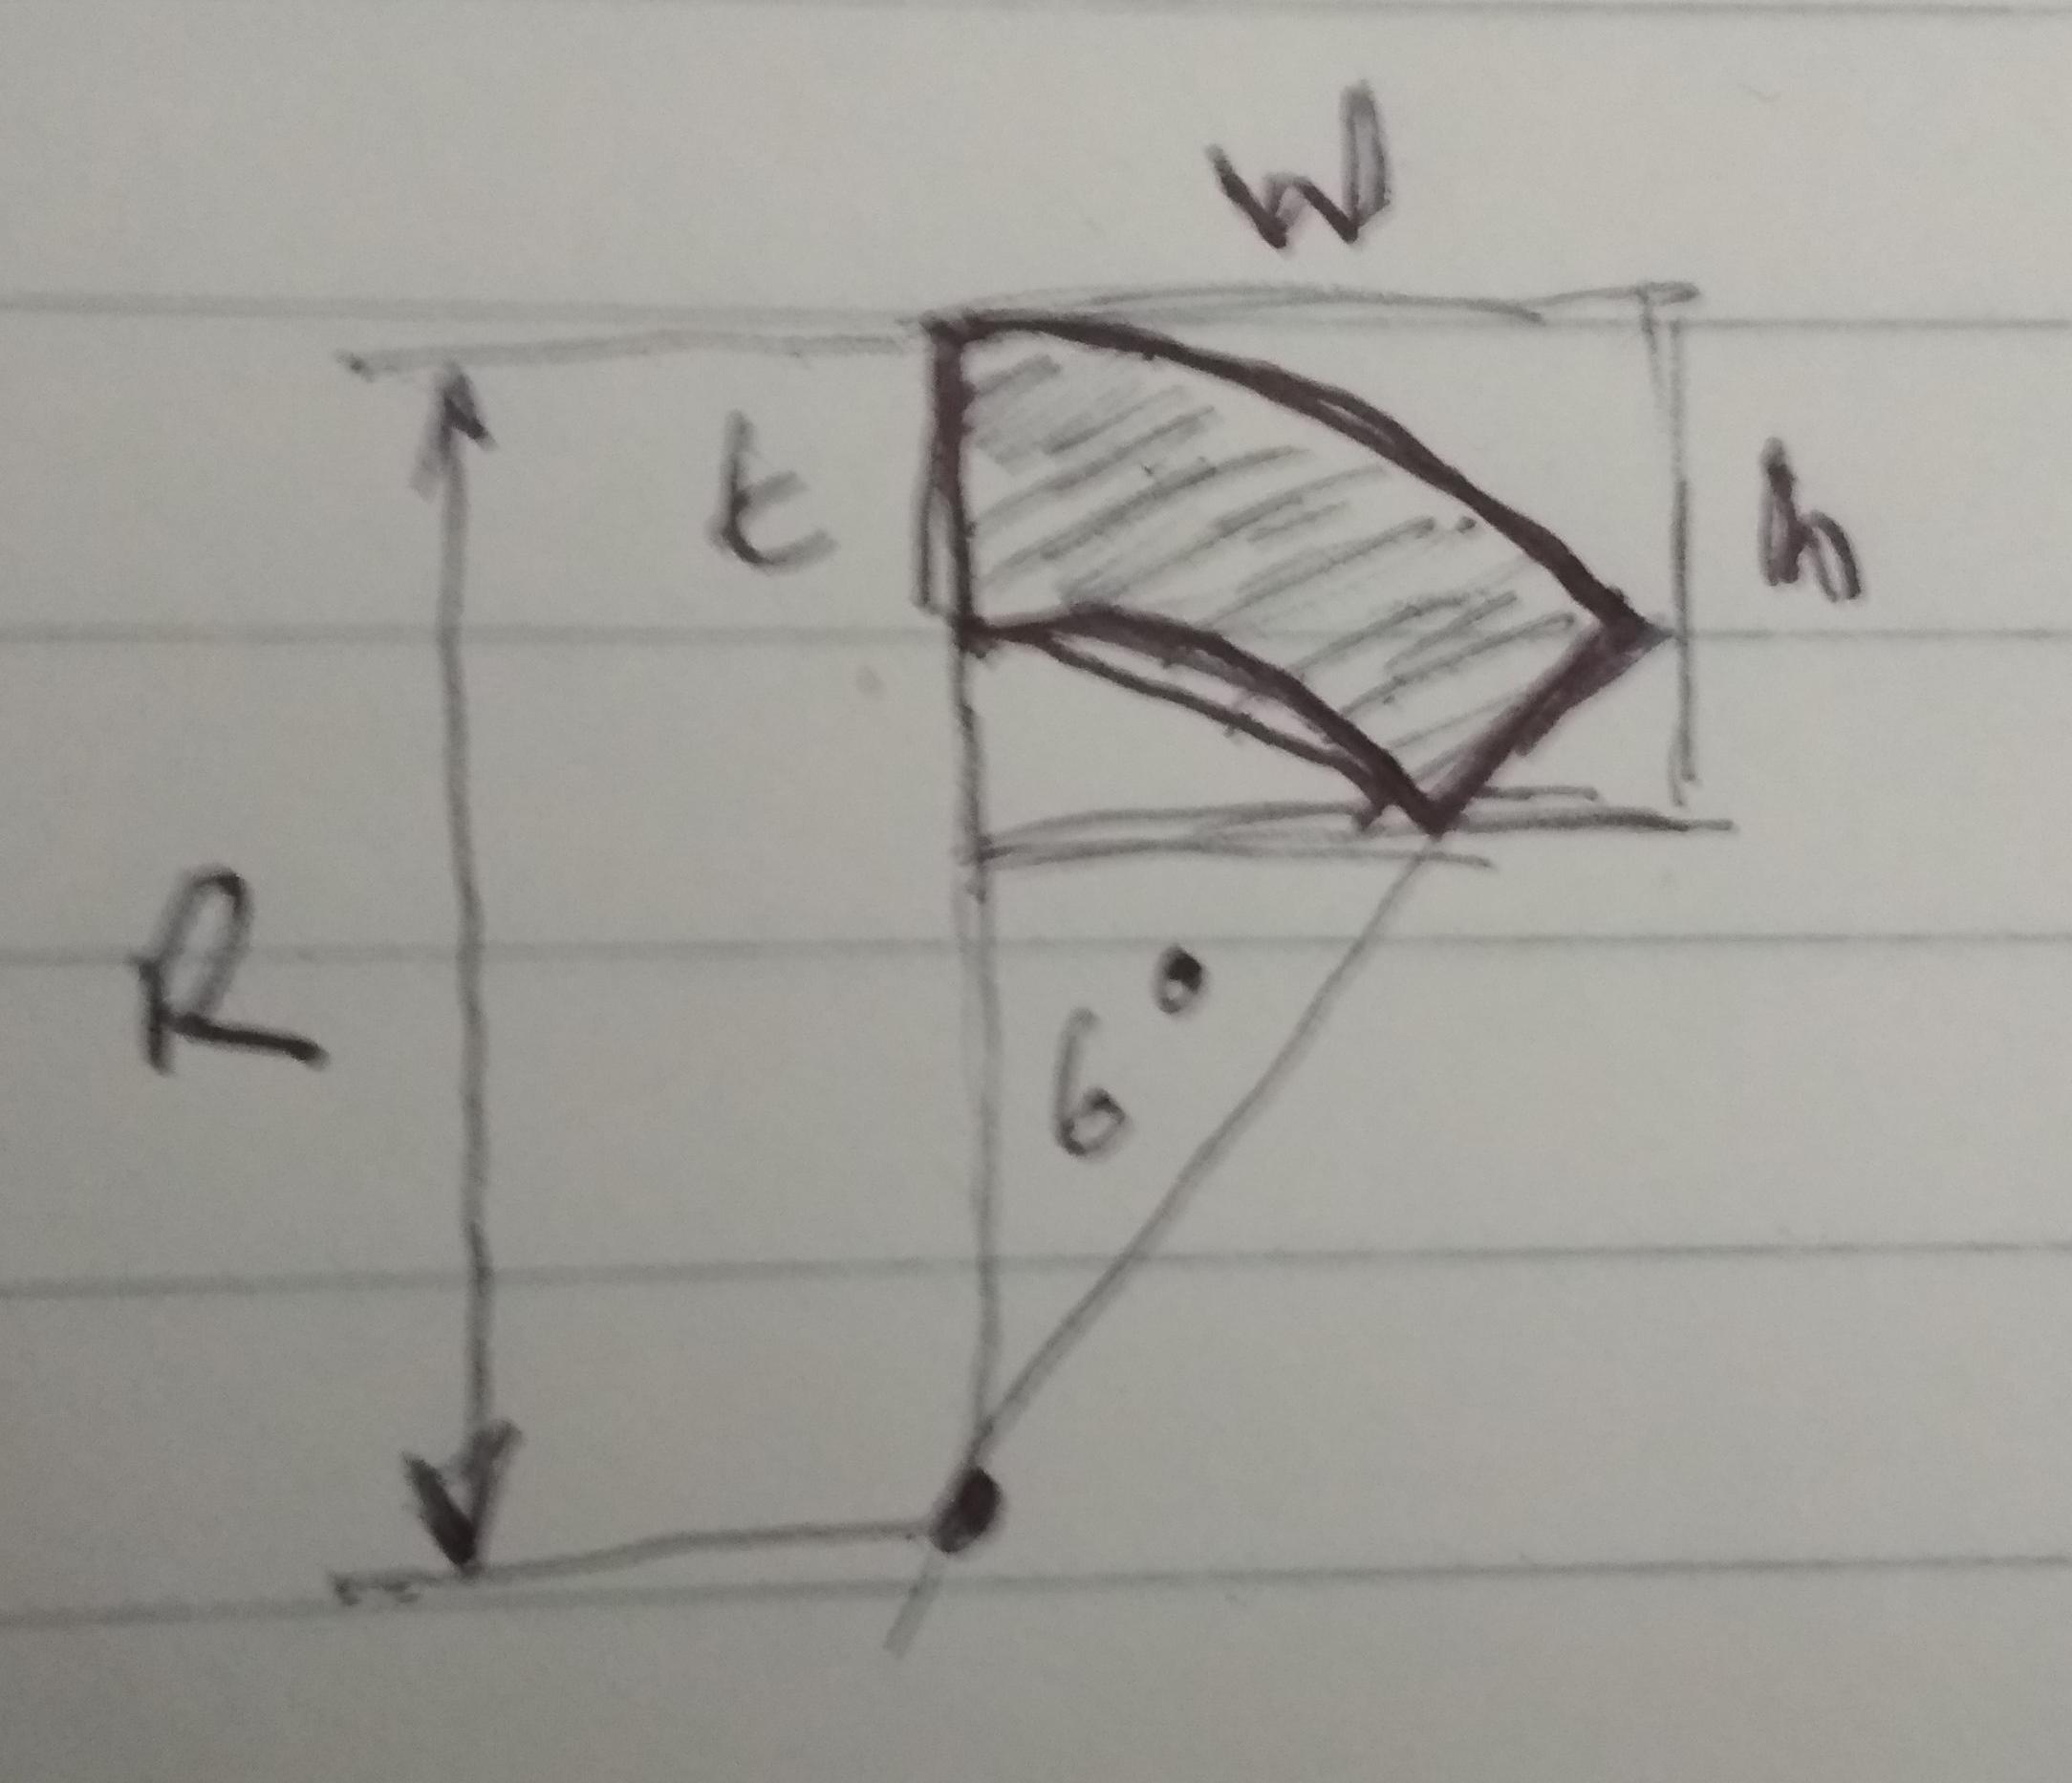
drawSmallGuage(p)where p is the % completed we need to start with an image that has the following characteristics.R - is the external radius of the gauge - for circles clock with 3 circles this is 25 pixels.
t - is the thickness of the guage - for cicle clock with 3 circles this is 5 pixels.
w - the the width of a square image in PNG format that will result of R, and t.
h - is the heigth of the square image in PNG format that will result from R and t.Actually two colored images are needed one for the main guage colour and one for the background (not yet completed colour) though this can be done through code. The rest of the image needs to be transparent to colour so that it will be black if the background is black. Again once we have the basic image worked, the transparency and colour can be set in the Bangle image converter and via code.
To draw the gauge the a loop is used to work out to rotate the image by 6 desgrees and move it around the circle by the appropriate x,y values worked out through sin/cos etc. Once the % has reach the value of p the code switches to draw the remainder of the gauge in the gray colour.
I will look up the values that I think are needed for t and R for the circle clock.
1 Attachment
You are reading a single comment by @HughB and its replies.
Click here to read the full conversation.
 HughB
HughB
Here it is. That was actually much quicker to draw than the previous drawing. I used 6 degrees segments. Feel free to use it, consider it's CC0.
I did it in Inkscape and "grouped" some elements to make it easier to manipulate. Use ctr+shift+d to ungroup, ctrl+d to group.
If it's drawing, I probably can contribute and I'm happy to, because I can't contribute with code.