-
• #2
Hi!
Just for a proof of concept, you can make do with just some wire and buttons - but a soldering iron and solder would make it much nicer and more reliable. I'd strongly suggest https://pine64.com/product/pinecil-smart-mini-portable-soldering-iron/ if you wanted to go that route.
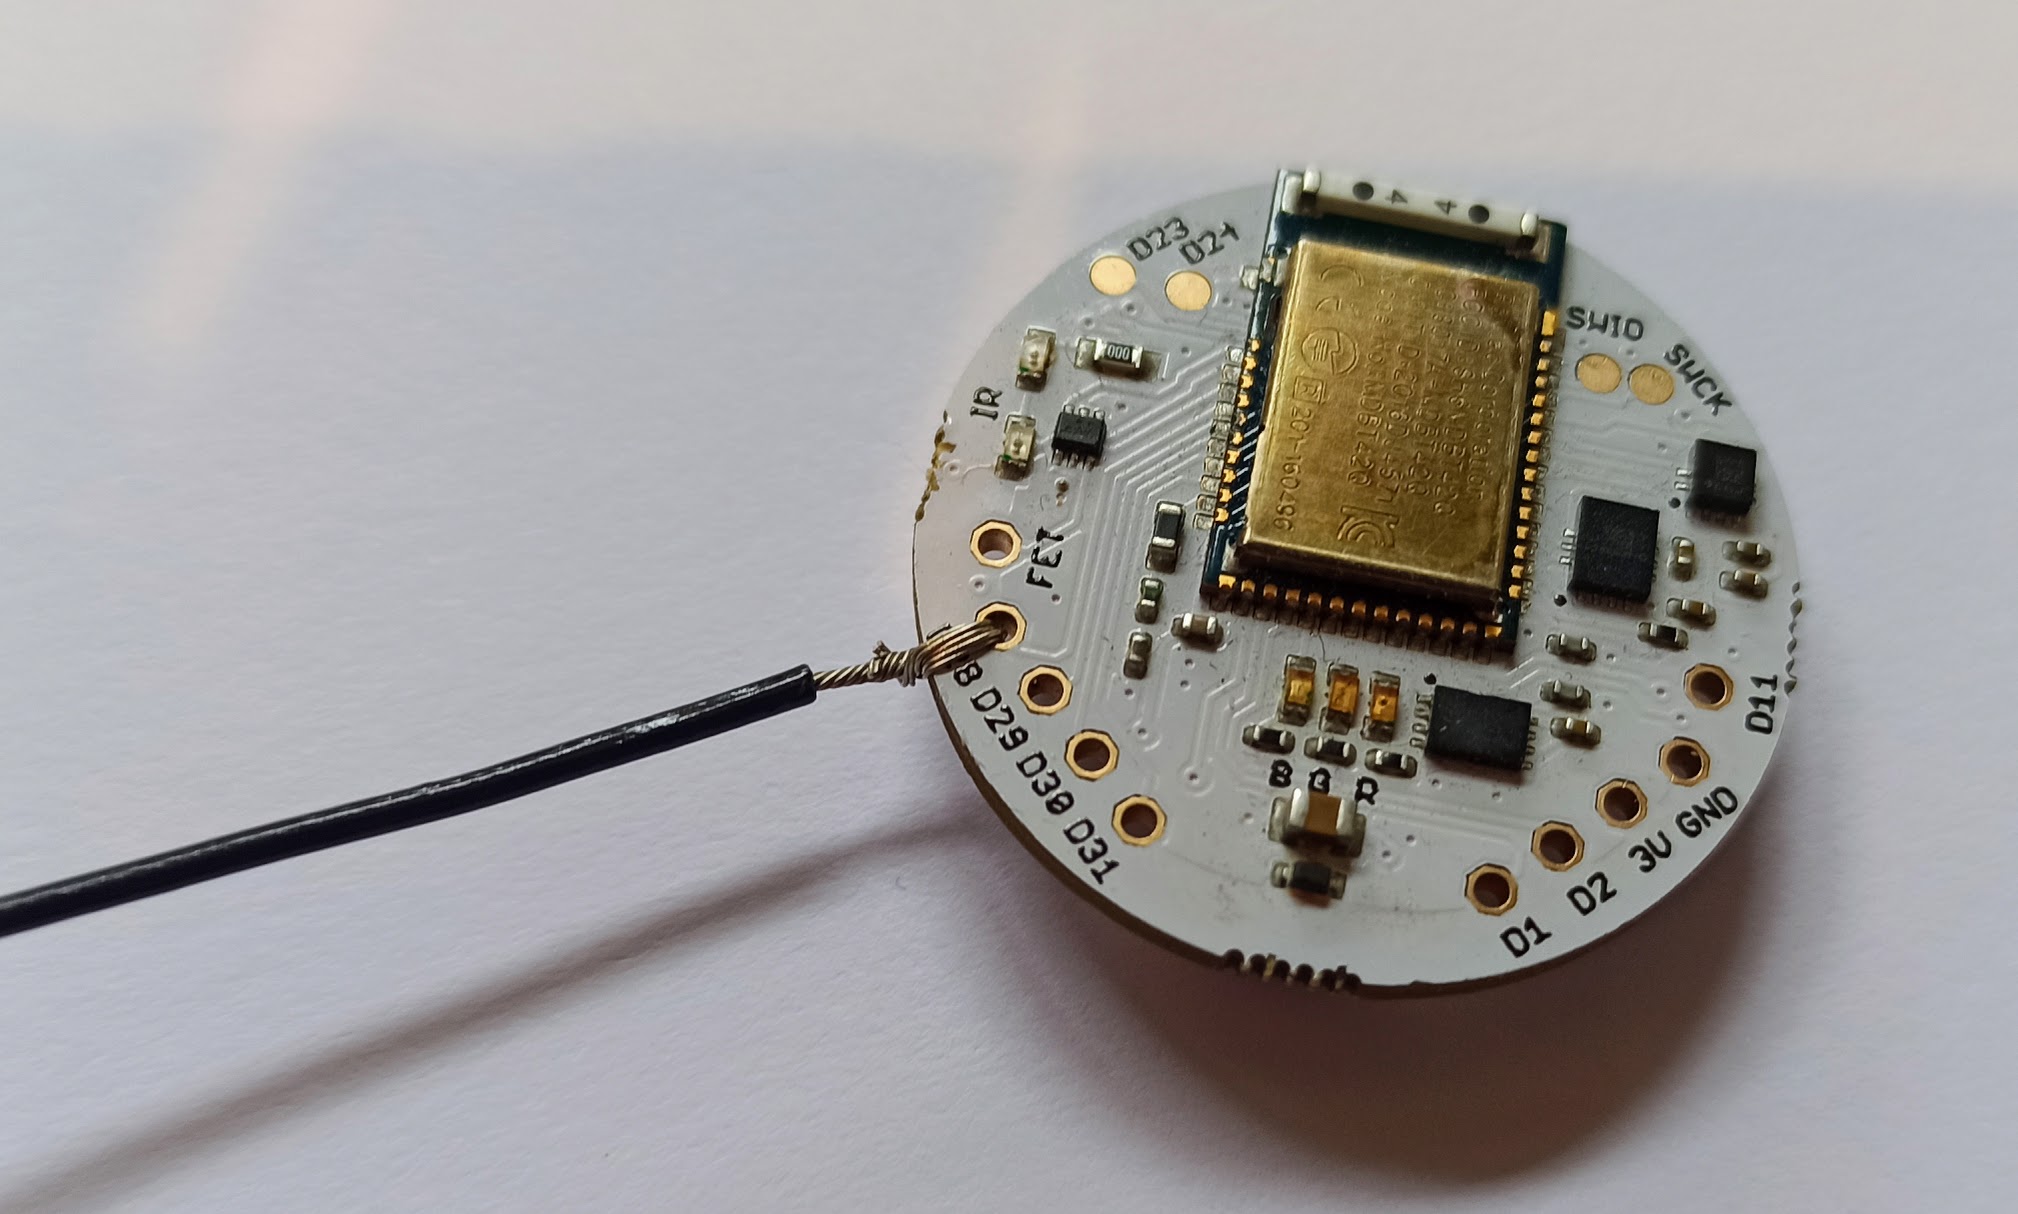
But without an iron, just strip the plastic shielding off the wire (you can use your teeth in a pinch) then twist the wire braid with your finger so it's nice and smooth, poke it through the holes in the Puck and twist it back on the other side - see the attached.
You just need two wires per button - to make it easy put one on
3Vand the other on a signal wire (which starts withD, likeD1), and the tutorial at http://www.espruino.com/Pico+Buttons (while for breadboard and a different device) does give you the code you need.
1 Attachment
-
• #3
Hi Gordon,
That's great, thank you for the information. I have just purchased a Puck. I will go with the non-solder option for the proof of concept.
You just need two wires per button - to make it easy put one on 3V and the other on a signal wire
So if I were to attach a single button to the Puck, I could attach one wire to
D1, and one wire to3V. If I wanted to attach a second button, which holes could I use? It appears that there is only one3Von the Puck.I've had a look into buying some wire. I can see that I need stranded wire, like these. Which AWG wire size is most suitable for the small holes on the Puck?
Thanks
RS -
• #4
So if I were to attach a single button to the Puck, I could attach one wire to D1, and one wire to 3V.
Exactly, yes. Then you do
pinMode(D1,"input_pulldown");which makes Espruino turn on an internal pull-down resistor and you can use.D1.read()/digitalRead(D1)to read orsetWatchto get a callback when it changes.If I wanted to attach a second button, which holes could I use? It appears that there is only one 3V on the Puck.
Easiest might be to just thread two wires through the 3V hole, but you can also use another
D...pin instead and then do (for example)D30.write(1)to make that into a 3V output.Which AWG wire size is most suitable for the small holes on the Puck?
I was using 7/32 AWG wire here (7 strands of 32 AWG), but using that link you found, I think 24 AWG is the equivalent.
As long as it goes though the hole it's not a big deal - if you have any old ethernet/USB/etc cables you could just cut those up and remove the wire out the middle for your testing.
Just a note too - for the external buttons it might be nice to buy ones with holes in the tabs on the end, so you can do a similar thing to attach the wires.
-
• #5
Thank you very much, Gordon.
I'm looking forward to playing with the Puck and experimenting with this idea!
-
• #6
This went well. I have both buttons working as desired, thanks.
-
• #7
Great! Thanks for letting us know!
 Gordon
 user155650
Hello,
I would like to attach multiple external buttons to a Puck. I want to do this so that I can send different commands via Bluetooth to an iPhone that the Puck is connected to. I'm aware that the Puck has a button underneath the silicone, however my use-case involves the buttons being distanced from the Puck itself, so I need some buttons wired into the Puck.
I of course need a Puck and some buttons. However, I don't know what other equipment I need to wire it all up.
What else do I need? Will I need a soldering iron?
I would like to use a Puck because it is powered by a small battery. If there is an alternate device that is powered by a small battery, and can also have external buttons connected, then I am open to using that, if its more appropriate.
I have no experience with hardware projects, but I am absolutely willing to learn.
Thanks
RS
1 Attachment