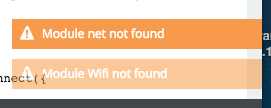
-
• #2
Maybe just try unplugging the USB-TTL completely and plug the Sonoff into the mains? You should be able to see it appear as a new
ESPsomethingaccess point if it's working.It's highly likely that your USB-TTL converter won't supply enough power on the 3.3v line. When I did mine in the video I'd got a beefed up 3.3v regulator added to it.
-
• #3
OK thank you,
is it possible to subsitute the 3.3 FTDI with Lipo ?
-
• #4
I don't think so unless you can drop the voltage with a diode. LiFePo4 batteries are in the right voltage range though.
You could always run from the mains, and should be able to connect the USB-TTL converter (just not with the 3.3v supply connected). The only reason I'm less happy about suggesting that is you want to be really careful you don't touch the mains connection.
-
• #5
Hello,
Thank you for your advice, I was thinking of doing this but I was not sure it would work, but I gave it a try and... it still fails.
To do so, I've plugged the main to the Sonoff and :
Sonoff |------------| FTDI
TX ------------ RX
RX ------------ TX
GND ------------ GND(I'm sure my wiring RX/TX is ok. If i swap it fails miserably to load the .bin)
Here is the output of esptool :
kiwis:esptool-master kiwis$ ./esptool.py --port /dev/tty.wchusbserial410 write_flash 0 ../espruino_1v93_esp8266_combined_512.bin
esptool.py v2.2-dev
Connecting........_____....._____....._
Detecting chip type... ESP8266
Chip is ESP8266EX
Uploading stub...
Running stub...
Stub running...
Configuring flash size...
Auto-detected Flash size: 1MB
Flash params set to 0x0020
Compressed 524288 bytes to 326299...
Wrote 524288 bytes (326299 compressed) at 0x00000000 in 29.2 seconds (effective 143.5 kbit/s)...
Hash of data verified.

Leaving...
Hard resetting...
Moreover find attached the new output off the IDE with baudrate configured to 115200. A bit better, but not fully satisfying.
I will investigate on the FTDI side and may be Sonoff...
Can you confirm this is the right file I'm loading :
espruino_1v94_esp8266_combined_512.bin
Thank you for your help.
Regards;
1 Attachment
-
• #6
Hello,
Finally succeded to install the firmware, but I had to change parameters in the esptool command line ; -fs and -fm
./esptool.py --port /dev/tty.SLAB_USBtoUART write_flash -fs 8MB -fm dout 0x0 ../espruino_1v93_esp8266_combined_512.binBut, now I'm not able to connect to Wifi. I will double check my wifi configuration.
Connecting WiFi
Disconnected from WiFi
Disconnected from WiFi
Disconnected from WiFi
MQTT connecting
Uncaught InternalError: Unable to create socket
 at line 4 col 2
c)
 ^
in function "connect" called from line 1 col 29
b=new f(b.host,b);b.connect();return b
                            ^
in function "connect" called from line 35 col 4
  });
   ^
in function "mqttConnect" called from line 72 col 17
    mqttConnect();
                ^
in function called from system
Do you think something is missing in the code ?
1 Attachment
-
• #7
@user82278, could you please publish your code you upload and try to run?
-
• #8
Hello @allObjects,
Sorry, I didn't exposed my "project" here :
I'm just trying to reproduce Gordon's Home automation project, so this is the code I try :
(available here : https://www.espruino.com/Home+Automation)Naturally I've changed the Wifi ssid and password.
var WIFI_NAME = "Espruino"; var WIFI_OPTIONS = { password : "helloworld" }; var MQTT_HOST = "raspberrypi"; var PATH = "/mydevice/"; var LED = D13; var RELAY = D12; var BTN = D0; var mqtt; var wifi; function setState(v) { RELAY.write(v); LED.write(!v); mqtt.publish(PATH+"status", v?1:0); } function mqttMessage(pub) { console.log("MQTT=> ",pub.topic,pub.message); if (pub.topic == PATH+"set") { setState(pub.message!=0); } if (pub.topic == PATH+"eval") { try { mqtt.publish(PATH+"response", eval(pub.message)); } catch(e) { mqtt.publish(PATH+"exception", e.toString()); } } } function mqttConnect() { mqtt = require("MQTT").connect({ host: MQTT_HOST, }); mqtt.on('connected', function() { console.log("MQTT connected"); setTimeout(function() { mqtt.subscribe(PATH+"#"); }, 1000); }); mqtt.on('publish', mqttMessage); } function onInit() { console.log("Connecting WiFi"); setInterval(function() { if (!mqtt) return; if (!mqtt.connected) { console.log("MQTT disconnected... reconnecting."); mqtt.connect(); } }, 60*1000); wifi = require("Wifi"); wifi.on('connected',function() { console.log("Connected to WiFi"); }); wifi.on('disconnected',function() { console.log("Disconnected from WiFi"); }); wifi.setHostname("MYDEVICE"); wifi.stopAP(); wifi.connect(WIFI_NAME, WIFI_OPTIONS, function(ap){ console.log("Successful connect."); }); // wait, and connect MQTT setTimeout(function() { console.log("MQTT connecting"); mqttConnect(); }, 10000); } -
• #9
Update :
I was able to connect to Wifi with this code loaded on a Wemos D1. SO the code is fine. The only difference is that on the Wemos it is espruino 4m running and not 512k.1- Can I load espruino 512k on a Wemos D1 ?
I will try to load the firmware and the same code on an other Sonoff to try.
Have a nice sunday.
2 - How can I change my notverypersonnal nickname on this forum ? It fails each time when I perform the action my profile.
-
• #10
I installed it on Wemos, works fine.
In the firmware .zip file there is readme file with a command line for 4MB upload.
I used that without any changes in params and it worked. -
• #11
I found the "-fm dout" to be a critical setting to get it to stick.
-
• #12
I've had to use the dio flash mode on my wemos boards. If both dout and dio work, dio is better.
-
• #13
I've had a report from a user that
./esptool.py --port /dev/tty.SLAB_USBtoUART write_flash -fs 8MB -fm dout 0x0 ../espruino_1v93_esp8266_combined_512.binworked for them - apparently fs and fm were needed.I guess maybe some revisions are different - the one I used for the video here:
https://www.youtube.com/watch?v=-BYHwGIMKXw
worked fine with the normal flashing commands.
-
• #14
SONOFF - 1 outlet - Reprogramming a $30 WiFi Switch - N outlets!
-
• #15
I was able to flash Tasmota FW using the following https://github.com/arendst/Sonoff-Tasmota/wiki/Esptool#upload-firmware instructions (-fm dout).
But I didn't have any luck with Espruino 2v00 version (haven't tried older versions unfortunately). I have tried with and without the
-fm doutas suggested but seen no access-point exposed upon restart.Is there here anybody who managed to use the 2v00?
-
• #16
Which firmware are you using - the 512k combined?
Does the flash succeed?
If you use putty or similar you should see output on boot - set to 115200 baud. There might be some initial output at the start with a baudrate of 74880 if it's looping and resetting set to that rate to see what the messages are saying.
-
• #17
Yes I used this one https://www.espruino.com/binaries/espruino_2v00_esp8266_combined_512.bin .
You mean connecting through the FTDI?
-
• #18
I'm using version 2v00.17 on my Sonoff.
Have downloaded espruino_2v00.17_esp8266.tgz.
esptool.py --port /dev/ttyUSB0 erase_flash
cleans sonoff,
androot=$(pwd)/espruino_2v00.17_esp8266
esptool.py --port /dev/ttyUSB0 --baud 230400 write_flash \
--flash_freq 40m --flash_mode qio --flash_size 512KB \
0x00000 $ root/boot_v1.6.bin \
0x01000 $ root/espruino_esp8266_user1.bin \
0x7C000 $ root/esp_init_data_default.bin \
0x7E000 $ root/blank.bin
installs on Sonoff.> Reset (); = undefined ____ _ | __ | ___ ___ ___ _ _ | _ | ___ ___ | __ | _ - | . | _ | | | | | . | | ____ | ___ | _ | _ | | ___ | _ | _ | _ | ___ | | _ | espruino.com 2v00.17 (c) 2018 G.Williams Espruino is open source. Our work is supported only by sales of official boards and donations: http://espruino.com/Donate Flash folder 512KB: 256/256, manuf 0xe0 chip 0x4014 >
 Gordon
 user82278

 allObjects
 Vasily
 Will
Will DrAzzy
 opichals
 Wilberforce
 Frida
Frida
Hi guys,
I started to post on "Sonoff troubles" but I think my problem is now different.
I try to install Espruino on a simple Sonoff.
I download Espruino 1.94
I upload it to sonoff via Esptool after I had pressed the button and plugged in the module :
It seems to be OK.
After that, I unplugged the module, repplugged it.
I'm not able to connect to Sonoff with Web IDE nor putty. Even if I've set baudrate to 115200 bd.
In WEB IDE I have "Connect" and a prompt ">" but I'm not able to type anything.
Do you have any idea ?
Thank you,
1 Attachment