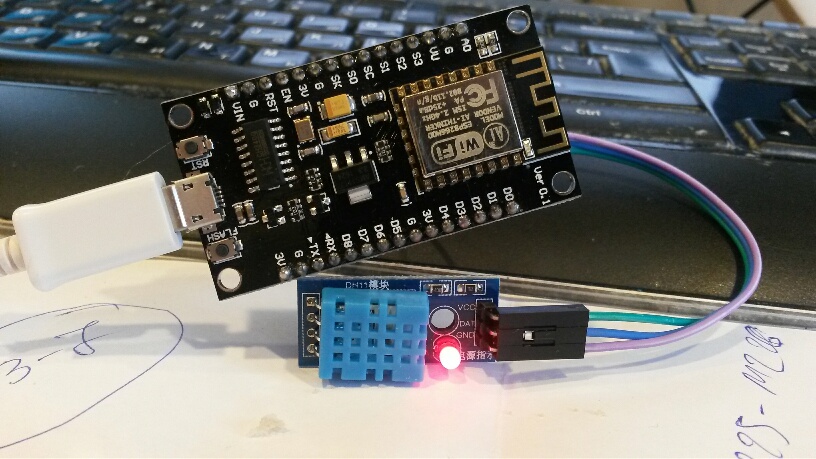
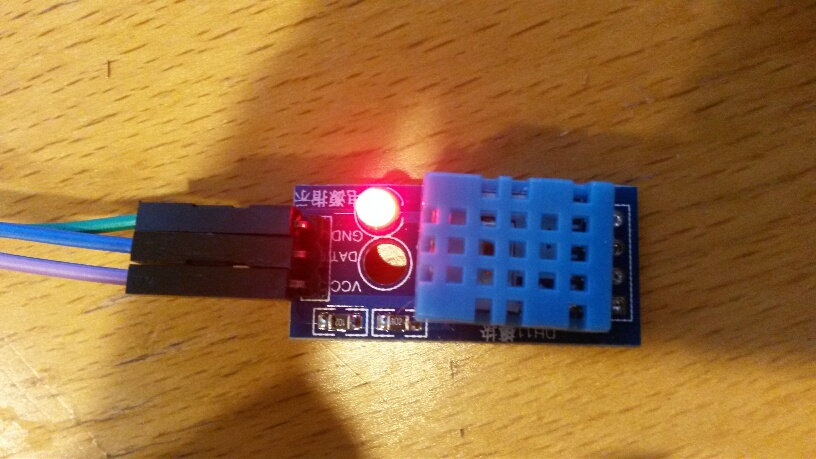
-
• #2
Hi @Aleksandrs
I don't have a DH11.
I would suggest disconnecting the DH11 and using an LED and resistor in series.
Use digitalWrite(D14,0) and digitalWrite(D14,1) and see if you have the correct pinhttp://crufti.com/getting-started-with-espruino-on-esp8266/
These links may be of use to you.
-
• #3
Pin is correct .. NodeMCU + DH11 work in Arduino.. but not working in ESPRUINO + DH11
ESPRUINO
result
{ "err": true, "checksumError": false, "raw": "0100", "temp": -1, "rh": -1 } -
• #4
http://www.espruino.com/EspruinoESP8266
Use this link to make sure you are naming the pin correctly in the call function.
var dht = require("DHT11").connect(D14); -
• #5
Ohh.
>console.log(NodeMCU.D5)
D14
this is GPI14
My script
// Init ESP8266 var ESP8266 = require("ESP8266"); E.setClock(80); var dht = require("DHT11").connect(D14); //NodeMCU D5 var dht2 = function(){ dht.read( function(a){ console.log(a); },10); }; dht2(); { "err": true, "checksumError": false, "raw": "0100", "temp": -1, "rh": -1 } -
• #6
On Arduino all is working
[#include](https://forum.espruino.com/search/?q=%23include) "DHT.h" [#define](https://forum.espruino.com/search/?q=%23define) DHTPIN 0 //DHT dht(DHTPIN, DHT22); DHT dht(DHTPIN, DHT11); void setup() { Serial.begin(9600); dht.begin(); } void loop() { delay(2000); float t = dht.readTemperature(); if (isnan(t)) { Serial.println("Error"); return; } Serial.print(t); } -
• #7
Try it with Pin D4.
I don't have a DH11 module.
I looked at Pin D14 with a scope and ran your code. No pulses.
With Pin D4 I get pulses.
var dht = require("DHT11").connect(D4); -
• #8
Maybe this help
DH11 VCC connected to board 3.3v
DH11 DATA connected to board D2 (GPIO04)
DH11 GND connected to board Gecho(1); // Init ESP8266 var ESP8266 = require("ESP8266"); //ESP8266.setLog(2); //ESP8266.printLog(); E.setClock(80); var dht = require("DHT11").connect(D4); setWatch(function(e){ console.log(e.time - e.lastTime); }, D4, {repeat: true, edge:"both"}); var dht2 = function(){ dht.read( function(a){ console.log(a); }); }; Result: >dht2() 109002> > jshCanWatch: pin=4 109002> < jshCanWatch = true =undefined >109526> > jshCanWatch: pin=4 109526> < jshCanWatch = true 110048> > jshCanWatch: pin=4 110048> < jshCanWatch = true 110573> > jshCanWatch: pin=4 110574> < jshCanWatch = true 111097> > jshCanWatch: pin=4 111098> < jshCanWatch = true 111620> > jshCanWatch: pin=4 111621> < jshCanWatch = true 112142> > jshCanWatch: pin=4 112142> < jshCanWatch = true 112664> > jshCanWatch: pin=4 112664> < jshCanWatch = true 113186> > jshCanWatch: pin=4 113186> < jshCanWatch = true 113711> > jshCanWatch: pin=4 113711> < jshCanWatch = true { "err": true, "checksumError": false, "raw": "0100", "temp": -1, "rh": -1 }Firmware latest:
1v87.223 Copyright 2016 G.Williams
Espruino is Open Source. Our work is supported
only by sales of official boards and donations:
http://espruino.com/Donate
Flash map 4MB:512/512, manuf 0xe0 chip 0x4016
1 Attachment
-
• #9
Try the example at the end of this link to see if the pin is correct.
http://crufti.com/getting-started-with-espruino-on-esp8266/
var led = new Pin(4);
var toggle=1;

setInterval(function() {
  toggle=!toggle;
  digitalWrite(led, toggle);
}, 500);

//You should see the LED connected to D2 blinking:
There is also a DH22 module that you could try in the software require(DH22).
-
• #10
Pull up resistor.
http://forum.espruino.com/conversations/291256/ -
• #11
I in This sensor have resistor. Interesting in
Arduino working,
NodeMCU + LUA working,
Espruino+JavaScript do not working.
1 Attachment
-
• #12
@Aleksandrs so what you are saying is that the hardware is the same and that Arduino and Lua code ist working - so compare Lua code for DH11 with Espruino DH11.
-
• #13
@Aleksandrs, were you successful with the example [crufti.com/getting-started-with-espruino-on-esp8266/](crufti.com/getting-started-with-espruino-on-esp8266/ that @ClearMemory041063 was asking you to begin with to verify 'the pin story'?
At least you will find out wether the Espruino setup on you particular NodeMCU board and ESP866-ESP12 is ok and operation is as expected...
After that, you venture into the next thing, like connecting the sensor.
After that, you step back and just try the simplest communication - first just with connecting to an access point and pulling down what is coming from this url: http://www.pur3.co.uk/hello.txt. With that you will find out whether you can connect or not...
From there, you take the next steps...
-
• #14
Ok thanks all for .. help... all working with AM2301(DHT21) he working properly. But do not working with DH11.
 ClearMemory041063
 Aleksandrs

 MaBe
MaBe allObjects
But result Temp is -1 and RH is -1