-
• #2
I'm not sure if they're referring to the TLC5916 or the MIC5891 (or even just the LEDs) as being the 5V parts?
The TLC5916 datasheet seems to suggest that it'll happily run off of 3.3V and will work off of 3.3v logic levels. The only problem is when you run it at 5v and it wants 0.7x5v = 3.5v logic inputs.
For the MIC5891, it's hard to tell (I can't find the info for logic levels) but I imagine it would be fine. The only gotcha is that it seems it wants to run on at least 5v.
It's all so close it'll almost certainly 'just work' on 5v - you could just connect it up and see what happens, it's not like anything will get blown up.
The other option is to take the pins that need 5v conversion (I guess Display , MIC and TLC*) and to just pull them up to 5v with a (5kOhm?) resistor. As long as you choose 5v capable pins on Espruino, you can switch them to 'Open Drain' mode, which will mean that when outputting a 1, the resistor will be able to pull the voltage right up to 5v and it'll all be within spec.
If you did want to fit a regulator, I'd put the 5v output to VBat of Espruino so the most voltage you have on the board is 5v. It's not like it really matters though.
-
• #3
Whoop! Kit is finally in stock and on order (though subject to a weeks dispatch, sigh!). I've got my basic proto-boards here, but my purpose designed shield adapter is still waiting to be made. Once it's done, it seems to take about a week to get here so depending on when things arrive, I should hopefully get this rolling in a week or two.
Matt
-
• #4
Well the gamer has arrived so just waiting for my adapter boards to show up :)
1 Attachment
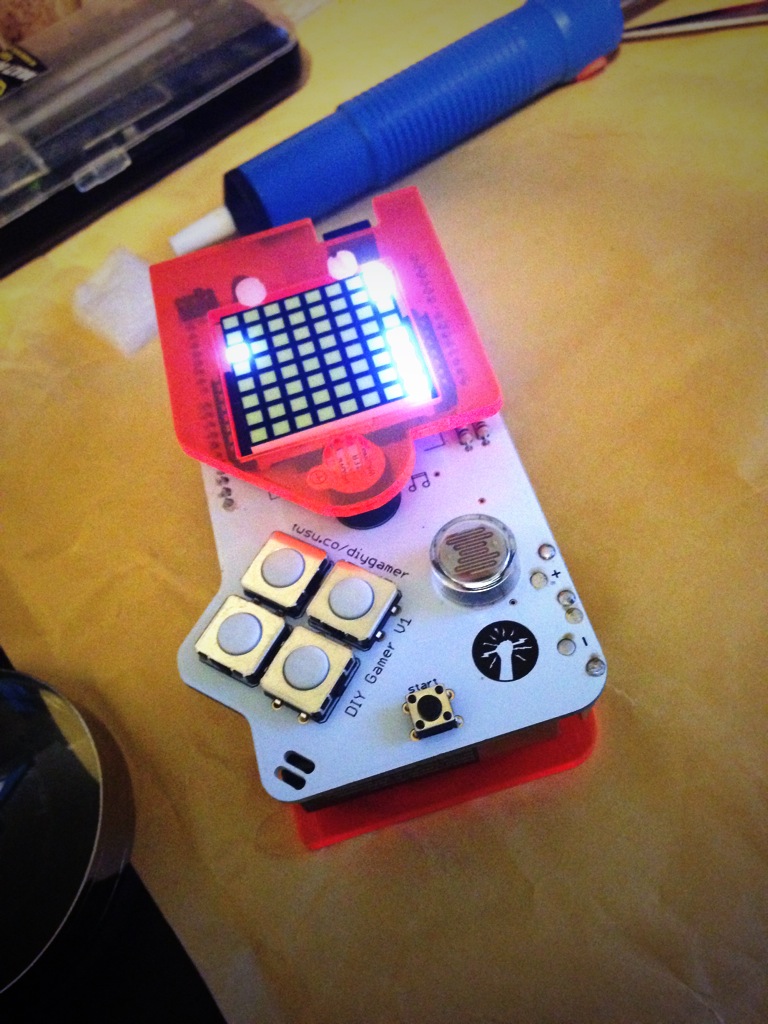
-
• #5
Ok, so today is the day my Arduino adaptors came so I've been testing some of the basic components. So far I can control the LED, I can sound the Buzzer (currently just setting it to high, but will figure out PWMing it later). I've also tested all the buttons which seem to work too (apart from I forgot pin C3 on my arduino shield so had to solder a wire across).
A couple of questions then. If I want to watch all the buttons, do I setup watches on all the pins? or is there a way to watch multiple pins and determine which one was triggered? Also, should I be setting the pinMode myself? or will watching the pins just be enough? if I do set the pinMode, what input mode would I need (I still never quote get when to pullup or pulldown)?
The last "simple" component to test is the light sensor. If I understand this forum post correctly, does this mean I'm not able to watch the pin for changes? rather would need to setInterval and check the value periodically? Probably not a big deal if I do, as power preservation won't be key.
Cheers guys
Matt
-
• #6
Thought I'd give the Matrix a try by porting over code from the gamer library here, which has been converted to:
var OE = B6;
var CLK1 = C6;
var CLK2 = C7;
var DAT = C8;
var LAT = C9;

var HIGH = 1;
var LOW = 0;

pinMode(OE,   'output');
pinMode(CLK1, 'output');
pinMode(CLK2, 'output');
pinMode(DAT,  'output');
pinMode(LAT,  'output');

var counter = 0;
var currentRow = 0;
var image = new Uint8Array(8);

var display = [
  [1,1,1,1,1,1,1,1],
  [1,1,1,1,1,1,1,1],
  [1,1,0,0,0,0,0,0],
  [1,1,1,1,1,1,1,1],
  [1,1,1,1,1,1,1,1],
  [1,1,0,0,0,0,0,0],
  [1,1,1,1,1,1,1,1],
  [1,1,1,1,1,1,1,1]
];


function updateDisplay()
{
  var newImg = new Uint8Array(8);
  for(var j=0; j<8; j++) {
    newImg[j] = 0x00;
    for(var i=0; i<8; i++) {
      newImg[j] <<= 1;
      newImg[j] |= display[j][i];
    }
  }
  if(newImg != image) {
    for(var i=0; i<8; i++){
      image[i] = newImg[i];
    }
  }
}

function updateRow()
{
	if(counter==8) {
		counter = 0;
		currentRow = 0x80;
	}
	writeToRegister(0);
	writeToDriver(image[counter]);
	writeToRegister(currentRow);
	currentRow >>= 1;
	counter++;
}

function writeToDriver(dataOut)
{
    //console.log("Driver data:" + dataOut);
	digitalWrite(OE, HIGH);

	for(var x=0; x<=7; x++) {
      digitalWrite(CLK1, LOW);
      digitalWrite(DAT, (dataOut & (1<<x)) >> x);
      digitalWrite(CLK1, HIGH);
    }

	digitalWrite(LAT, HIGH);
	digitalWrite(LAT, LOW);
	digitalWrite(OE, LOW);
}

function writeToRegister(dataOut)
{
    //console.log("Register data:" + dataOut);
	digitalWrite(LAT, LOW);

	for(var y=0; y<=7; y++) {
      digitalWrite(DAT, (dataOut & (1<<y)) >> y);
      digitalWrite(CLK2, HIGH);
      digitalWrite(CLK2, LOW);
	}
	digitalWrite(LAT, HIGH);
	digitalWrite(LAT, LOW);
}

updateDisplay();

setInterval(function(){
  updateRow();
}, 1);
And it actually works, to a degree :) Right now, because it's using a bitshifter to update the LED rows one at a time, it seems the Espruino isn't firing quick enough to make it look seemless.
Is there anything that can be done to speed this up? or can anyone suggest any alternative way of updating the display in one burst?
Many thanks
Matt
-
• #7
is there a way to watch multiple pins and determine which one was triggered?
You'd just have to use setWatch multiple times...
should I be setting the pinMode myself or will watching the pins just be enough?
Nope, not unless you need to use the internal pullups (which I doubt?)
The last "simple" component to test is the light sensor. Does this mean I'm not able to watch the pin for changes? rather would need to setInterval and check the value periodically?
Yes, it's just software I'm afraid...
Is there anything that can be done to speed this up?
Yes... You can use SPI (if it's connected) otherwise the new Espruinos (from http://www.espruino.com/binaries/git) have software SPI. Simply doing:
var S1 = new SPI();
S1.setup({mosi:DAT, sck:CLK1});
var S2 = new SPI();
S2.setup({mosi:DAT, sck:CLK2});
...
function writeToDriver(dataOut) {
  digitalWrite(OE, HIGH);
  S1.send(dataOut);
  digitalWrite(LAT, HIGH);
  digitalWrite(LAT, LOW);
  digitalWrite(OE, LOW);
}
function writeToRegister(dataOut) {
  S2.send(dataOut, LAT);
  digitalWrite(LAT, LOW);
}
would help matters. You'd probably also find that 'inlining' the other functions into
updateRowwould speed things up a bit too. -
• #8
Thanks Gordon
When you say use SPI if it's connected, do you mean if the device supports it? Or do you mean specific pins? (Sorry if dumb questions) If they are, is it the same process as the code sample above? Or is that just for software based SPI? To use the new Espruino bins I take it I just need to re flash the board? Is it as simple as setting the URL to the binary I want to use in the options window?
Cheers
Matt
-
• #9
Yes, sorry - I mean if SPI is on those specific pins (see the reference). Using hardware SPI is as simple as using the built-in SPI1/etc rather than saying
new SPI. To get started, just use software though - there's really not much of a downside to it.To use the new Espruino, yes - just copy the URL into the flasher and flash it as normal :)
-
• #10
Yeah - reflash the board - disconnect, put espruino into bootloader mode (hold btn1 while resetting), connect again, put the URL into the flasher in the IDE, and tell it to flash. Then disconnect, reset espruino to leave bootloader mode, and you're ready to connect and play with the new software.
(to be clear - when I say "disconnect" and "connect", I'm talking about the connect/disconnect button in the IDE, not physically disconnecting it).The last "simple" component to test is the light sensor. Does this mean I'm not able to watch the pin for changes? rather would need to setInterval and check the value periodically?
If/when I get around to it, I'll test out using an LM339 to convert analog value to digital pulse if it's above/below a certain value (either fixed with resistors, or from one of the DAC pins), and if I can make it work, i'll write it up.
-
• #11
So I've re-flashed as suggested (thanks for step by step guys) which all went well, and have updated the code to as follows:
var OE = B6;
var CLK1 = C6;
var CLK2 = C7;
var DAT = C8;
var LAT = C9;

var HIGH = 1;
var LOW = 0;

pinMode(OE,   'output');
pinMode(CLK1, 'output');
pinMode(CLK2, 'output');
pinMode(DAT,  'output');
pinMode(LAT,  'output');

var counter = 0;
var currentRow = 0;
var image = new Uint8Array(8);

var display = [
  [1,1,1,1,1,1,1,1],
  [1,1,1,1,1,1,1,1],
  [1,1,0,0,0,0,0,0],
  [1,1,1,1,1,1,1,1],
  [1,1,1,1,1,1,1,1],
  [1,1,0,0,0,0,0,0],
  [1,1,1,1,1,1,1,1],
  [1,1,1,1,1,1,1,1]
];

var S1 = new SPI();
S1.setup({mosi:DAT, sck:CLK1, mode:3});

var S2 = new SPI();
S2.setup({mosi:DAT, sck:CLK2, mode:0});


function updateDisplay()
{
  var newImg = new Uint8Array(8);
  for(var j=0; j<8; j++) {
    newImg[j] = 0x00;
    for(var i=0; i<8; i++) {
      newImg[j] <<= 1;
      newImg[j] |= display[j][i];
    }
  }
  if(newImg != image) {
    for(var i=0; i<8; i++){
      image[i] = newImg[i];
    }
  }
}

function updateRow()
{
	if(counter==8) {
		counter = 0;
		currentRow = 0x80;
	}
	writeToRegister(0);
	writeToDriver(image[counter]);
	writeToRegister(currentRow);
	currentRow >>= 1;
	counter++;
}

function writeToDriver(dataOut)
{
	digitalWrite(OE, HIGH);
	S1.send(dataOut);
	digitalWrite(LAT, HIGH);
	digitalWrite(LAT, LOW);
	digitalWrite(OE, LOW);
}

function writeToRegister(dataOut)
{
    S2.send(dataOut, LAT);
	digitalWrite(LAT, LOW);
}

updateDisplay();

setInterval(function(){
  updateRow();
}, 1000);
(Just put a 1s interval for now to test) but I get an error in the terminal window:
INTERNAL ERROR: Timeout on SPI TX
INTERNAL ERROR: Timeout on SPI TX
INTERNAL ERROR: Timeout on SPI RX
at line 2 col 25
    S2.send(dataOut, LAT);
                         ^
in function "writeToRegister" called from line 6 col 22
in function "updateRow" called from line 2 col 13
in function called from system
ERROR: Error processing interval - removing it.
Execution Interrupted during event processing.
@DrAzzy I'd love to see your write up if you get that working.
-
• #12
whoa. Sorry - regression :) Fixed now though.
Try the latest git commit from here in an hour or so when it's finished building.
-
• #14
So, this is much faster and I actually get a solid image being drawn now, but will need to try a few more speed tweaks as it's just not quite fast enough (like a monitor in too low a refresh rate, you see slight flickering in the corner of your eye).
Other than inlining the methods in update row, is there anything else you can suggest? (currently got setInterval at 0.05)
PS The image rendering out now seems to be backwards (compared to what I had before) is this something to do with config? or should I just compensate in my code?
Matt
-
• #15
It'll be because SPI outputs most significant bit first. It'd be easy enough to change
updateDisplayto flip that around.I'd also consider replacing
currentRowwith1<<counter(or128>>counterif it's backwards). You can then remove the currentRow variable.I don't think you'll get much extra by decreasing
setIntervalpast 1 - in fact if you're telling it to go faster than it wants to, it might adversely impact rendering of other stuff.The hardware's a bit of a strange setup to be honest. It feels like a MAX7219 would have been way better (and would have only required a single chip to be soldered).
-
• #16
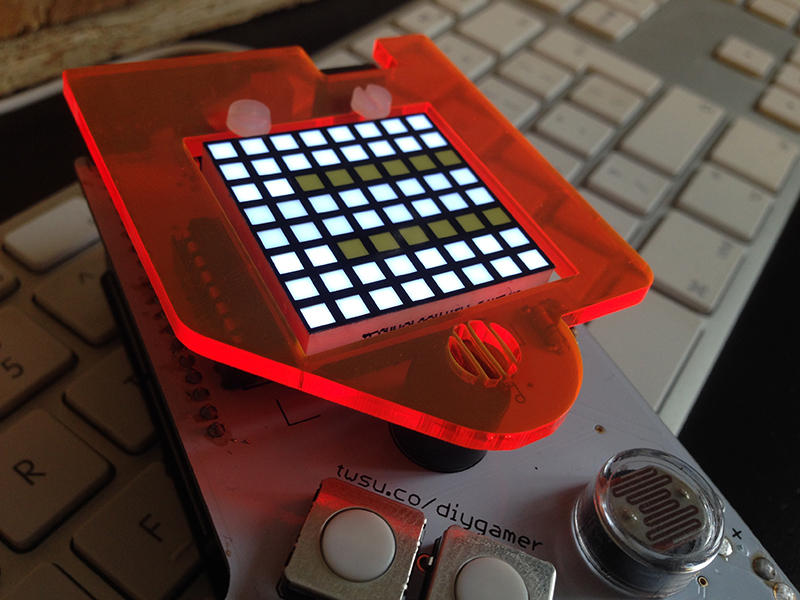
Cool, thanks @Gordon. I've inlined the two methods, and got rid of updateRow and moved all the logic within the setInterval function itself and it's a lot better. I think it could do with being a tiny bit faster (it does look solid now, but it's kinda like the old days of low res monitors, we you move your eyes, it looks a bit stuttery) but I'd say it's workable now at least.
I wondered the same about the MAX7129, but I'm guessing it was more about the looks than the functionality. It's fun to have a limitation though and try to work round it :)
Matt
1 Attachment
-
• #17
PS It does look better than that pic in real life, I just think the camera is picking up that every so slight delay.
-
• #18
It looks good!
You might be able to play with how
LATis set too - it may be that adding it toS1.sendwill work and will mean you don't need to use digitalWrite. Stuff likeOE.set();instead ofdigitalWrite(OE, HIGH);could also be faster.This is the sort of thing that Espruino really struggles with (lots of small updates), so it's good to see everything working ok :) I guess you appreciate it more if you have to work for it.
By the way, had you considered using
Graphics.createArrayBufferinstead of yourdisplayarray? That way you can use fonts, lines, rects, etc :) -
• #19
Hey @Gordon, thanks for the suggestions (kinda feels like we are mechanics tweaking the max horse power out of an engine :)), I'll give them a go later this evening.
RE the graphics lib, it's on my todo list, I was just porting their code over as close to original right now to get something working, but will defo look at using these once I'm happy with how it's running.
Matt
-
• #20
... The other option is actually to unroll the whole of updateRow, and update all rows at once and then turn the display off. It won't be as bright (might be better off 5v?) but it'll probably leave more time for doing other things, and the display won't 'glitch' if you spend a while calculating out what the next frame will be.
Also, change
setInterval(function(){
  updateRow();
}, 1000);
to
setInterval(updateRow, 1000);That'll save you some time as well ;)
-
• #21
Hmm, playing around with
.set();and passing the LAT into send doesn't seem to be making much of a difference. And I've already moved all the logic from updateRow into the setInterval function so no more gain to be had there :)Out of interest, what is that's the main issue here? the length of time it take to convert the JS into runtime + execution? or something else?
Wouldn't unraveling updateRow just be the same though? You can only update one row at a time with the bitshifter + led driver compo right?
Also, if I want to make the matrix run off 5v, where would the pullup resistor need go?
Matt
-
• #22
Yes, I think it's just execution speed. Not using constants (use 1, not high) and stuff like that helps... As does minimising whitespace! Just stick that function in a minifier and see if it helps :)
Unravelling updateRow would just reduce the overhead of executing functions and checking for the next thing to execute - I think it might help a bit.
For 5v, can't you just use the jumper that powers the 5v like from VBat, and then power off USB? That should help a lot - and I don't think you should need any resistors?
-
• #23
Thanks @Gordon. I'll give those a try too. I've actually just tried it running off battery (was previously USB) and that seems to stabilize a bit more of the flickering, so I think I'll just go with these and see what happens when I start adding game logic :)
Thanks for all the tips. It's good to know how you can optimize things :)
Matt
-
• #25
Try:
new Uint8Array(a).set(b). That'll be really speedy.
 Gordon
 mattbrailsford
 DrAzzy
Thought I'd start this thread off, as I have a few project specific questions I wouldn't mind some assistance with, but first off a bit of background.
I came across this cool kit http://shop.technologywillsaveus.org/collections/frontpage/products/diy-gamer-kit-with-arduino and thought, as it's just a bunch of buttons and an LED matrix, this could be uber cool to convert to use an Espruino.
My first steps are going to be making the Espruino share the same footprint as the Arduino, and for that I'm already working on an adapter (see http://forum.espruino.com/conversations/711/).
Once I have this, it should then be a case of mapping the Arduino pins, to the Espruino and re-writing the library.
After speaking to the producers of the kit, they said the only thing that might cause an issue is that the LED matrix is rated at 5v, so I'd need to use a Logic Level Converter to converts the Espruinos 3.3v to 5v.
So a couple of questions.
1) I'm going to need a 5v supply for the converter, so would it be best to a) run the input power supply through a 5v regulator first, and then to the Espruino and just sprout off from there, b) same as the above but attach the 5v regulator to vbat of the Espruino and feed the power supply straight into the Espruino first or c) use a step-up regulator to step up the 3.3v to 5v?
2) Given the attached diagram of pin usage, and the fact it's the LED display that is rated to 5v, which pins will need to converted to 5v?
Thanks for your help in advance.
Matt
1 Attachment